Evolution of a Vignette
/
heart of finished vignette
This is the story of one small, forlorn spot in a garden, and how it became an effective composition, over a month's time, in a client's garden. It's a "before and after," with all the steps between.
How to:
1.) First, start with an area in need of attention.
Background and parameters of the spot I am writing of today:
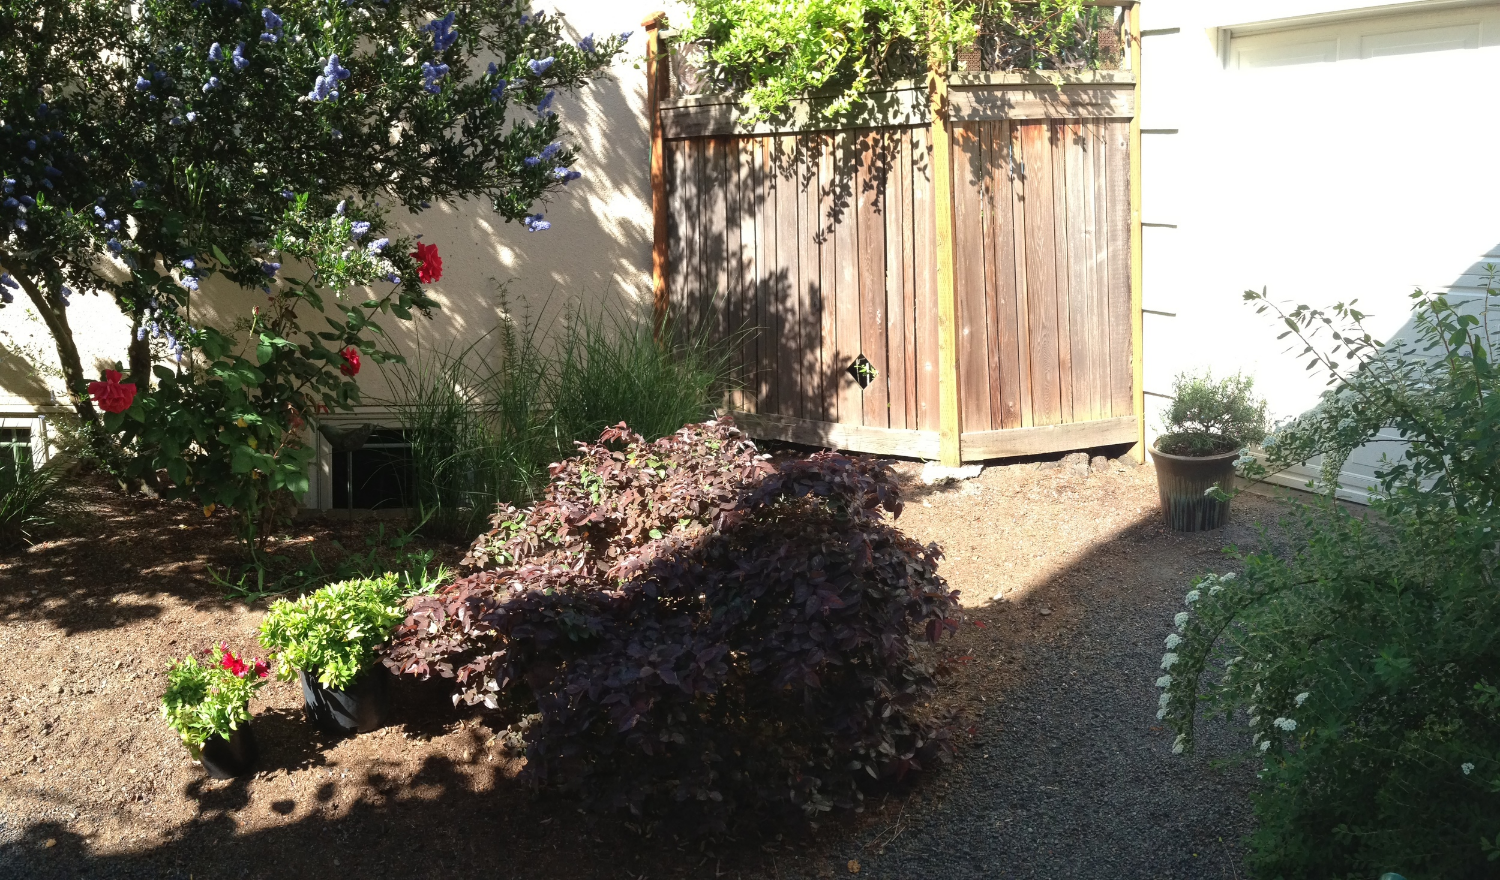
It's a small blank area to the left side of garage door. The driveway has been converted to a garden. The space is constrained by property line (the space I have to work with is maybe 3' deep). The side yard is "shared" (no fence down middle). A big blank wall and awkward angles of existing fence (on neighbor's property) form the backdrop.
This particular area was calling out for a focal point, as it has a direct site line from the back yard. When you move through the garden, you frequently come face to face with this spot. When we started, it was an ugly spot.
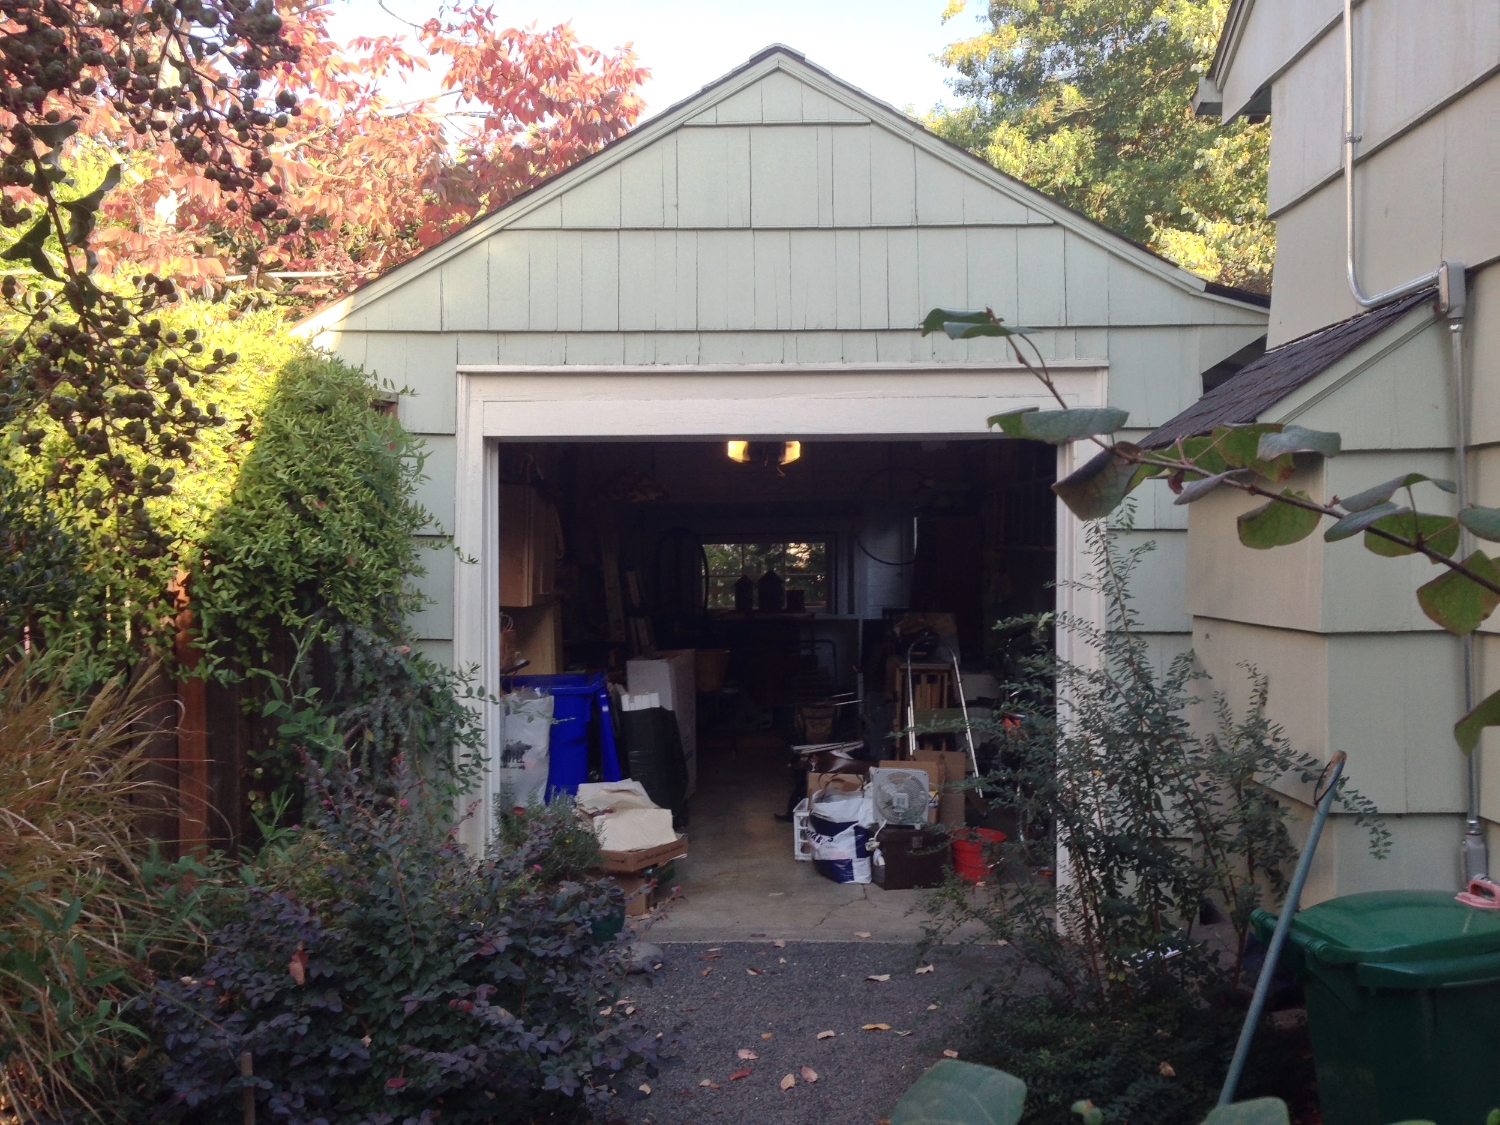
BEFORE PHOTO. Area of future vignette is left side of garage door. Neighbor's property line is at fence post to left of garage.
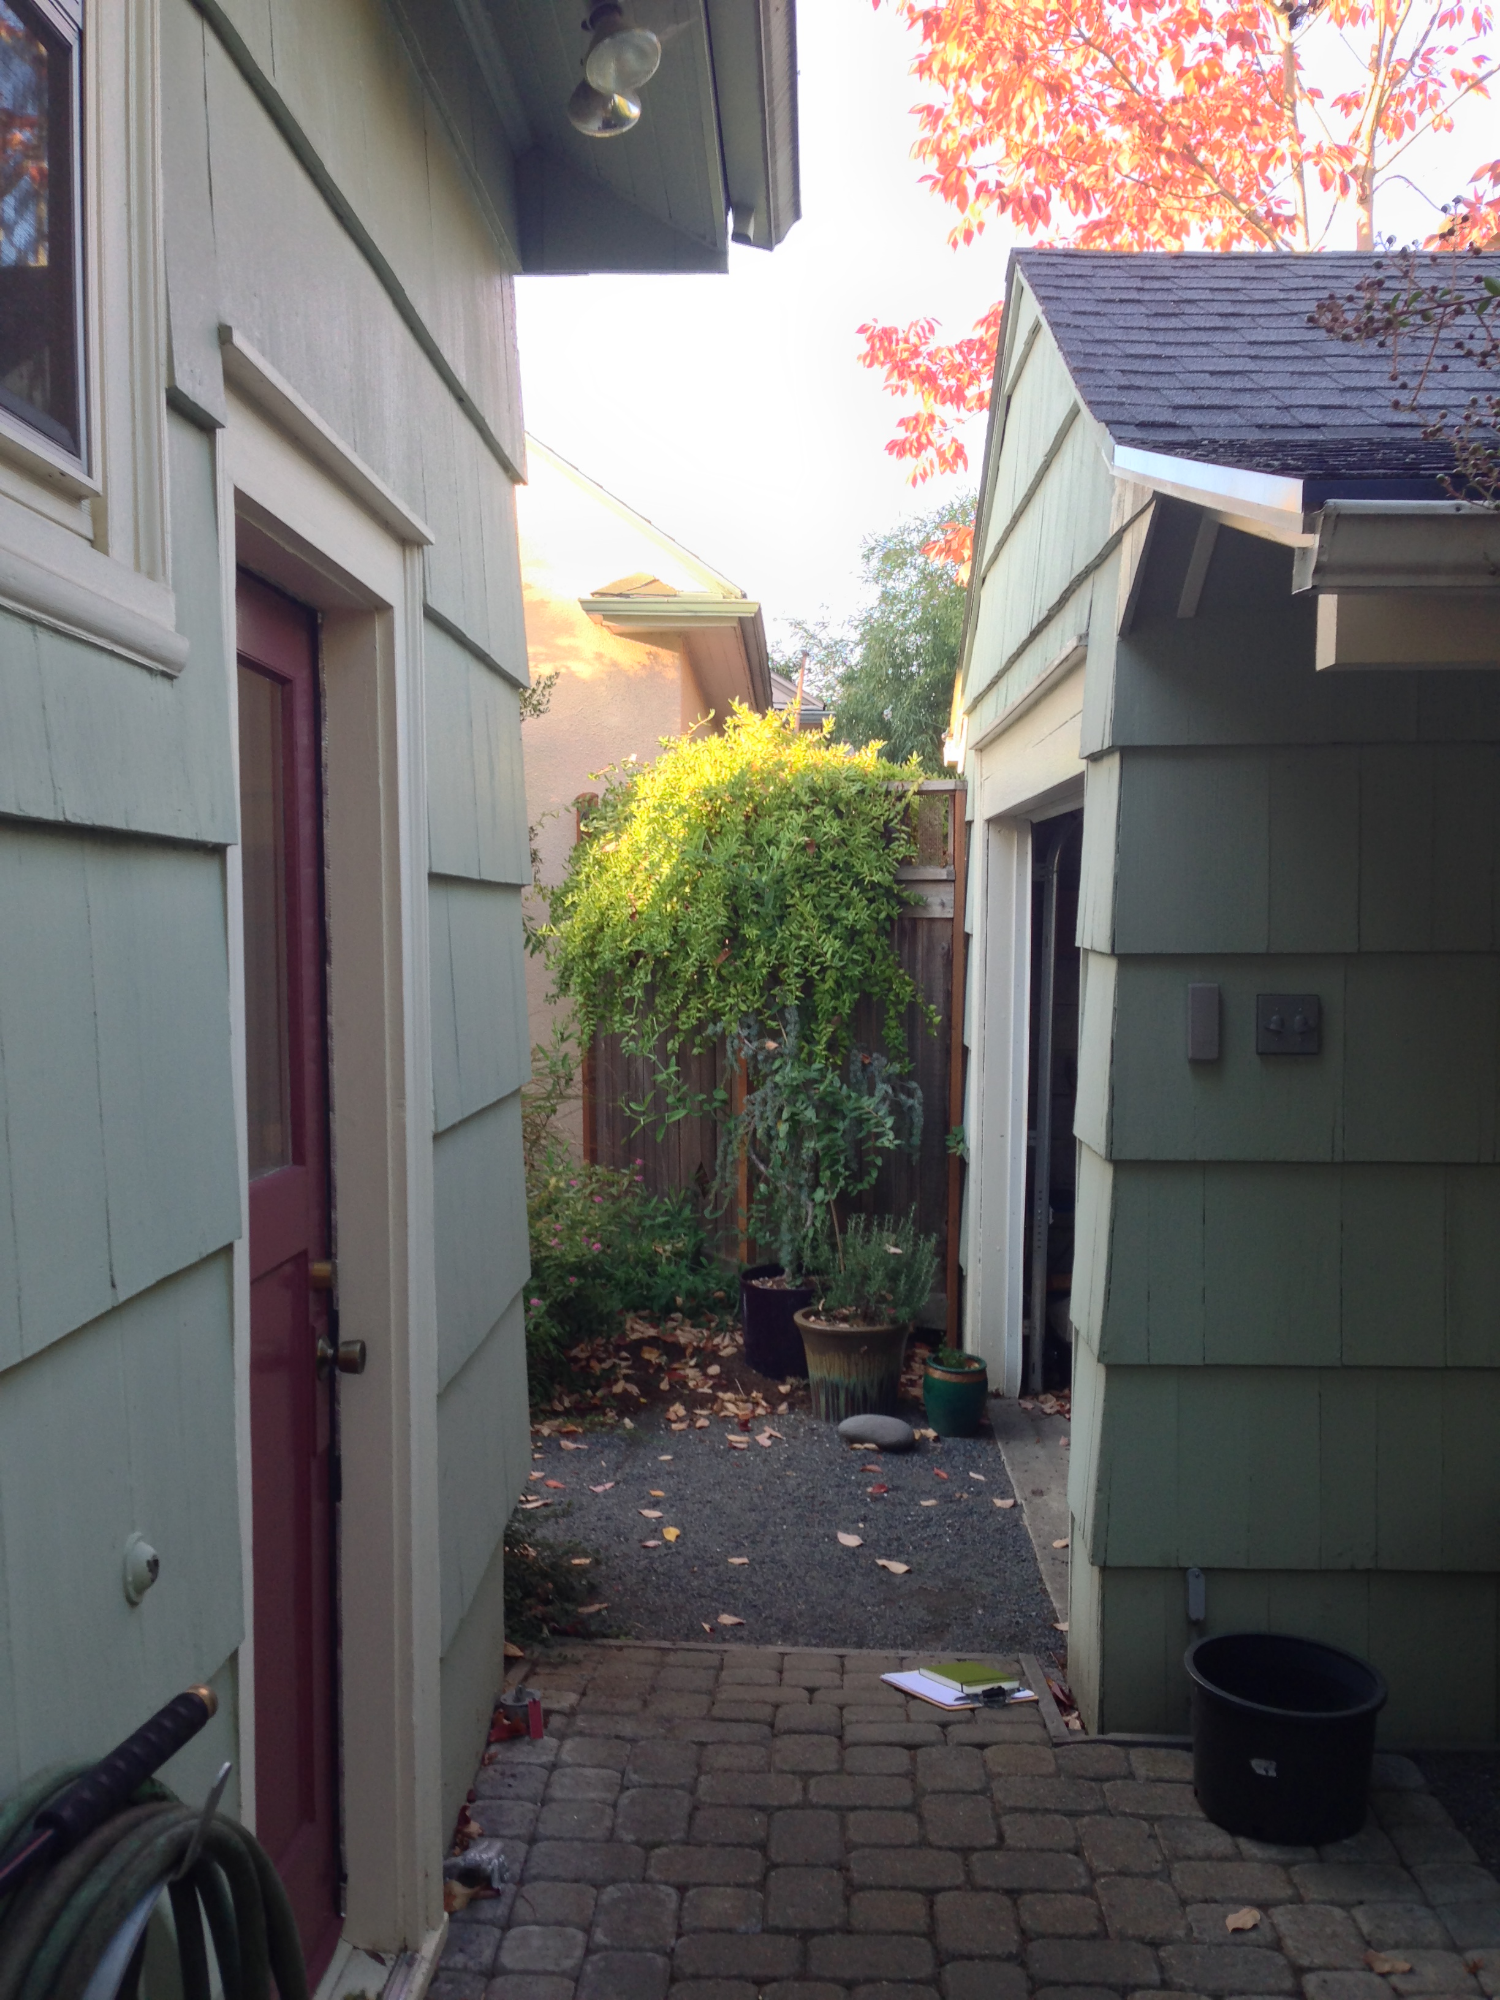
BEFORE PHOTO. Area of future vignette is straight ahead, center of photo.
2.) Stew for some time about the existing "stuff,", puzzle over solutions, and help the client to "let go."
Reasons for stewing in this particular case: Weeping Blue Atlas Cedar dominates the spot; its huge trunk is beginning to crack the pot; client doesn't like the plant much, but it was a gift from a friend when client's father passed away. Problem: client guilt for killing a plant and for a gift that held meaning (even thought they were not fond of the plant).
Solution: the Cedar finally broke its own pot, with roots that had become huge and wrapped around itself. Unsalvagable. Decision made.
BEFORE EDITING. Green spiraea in center-right was removed in favor of the purple-leaved Loropetalum . . . there was not enough room for both.
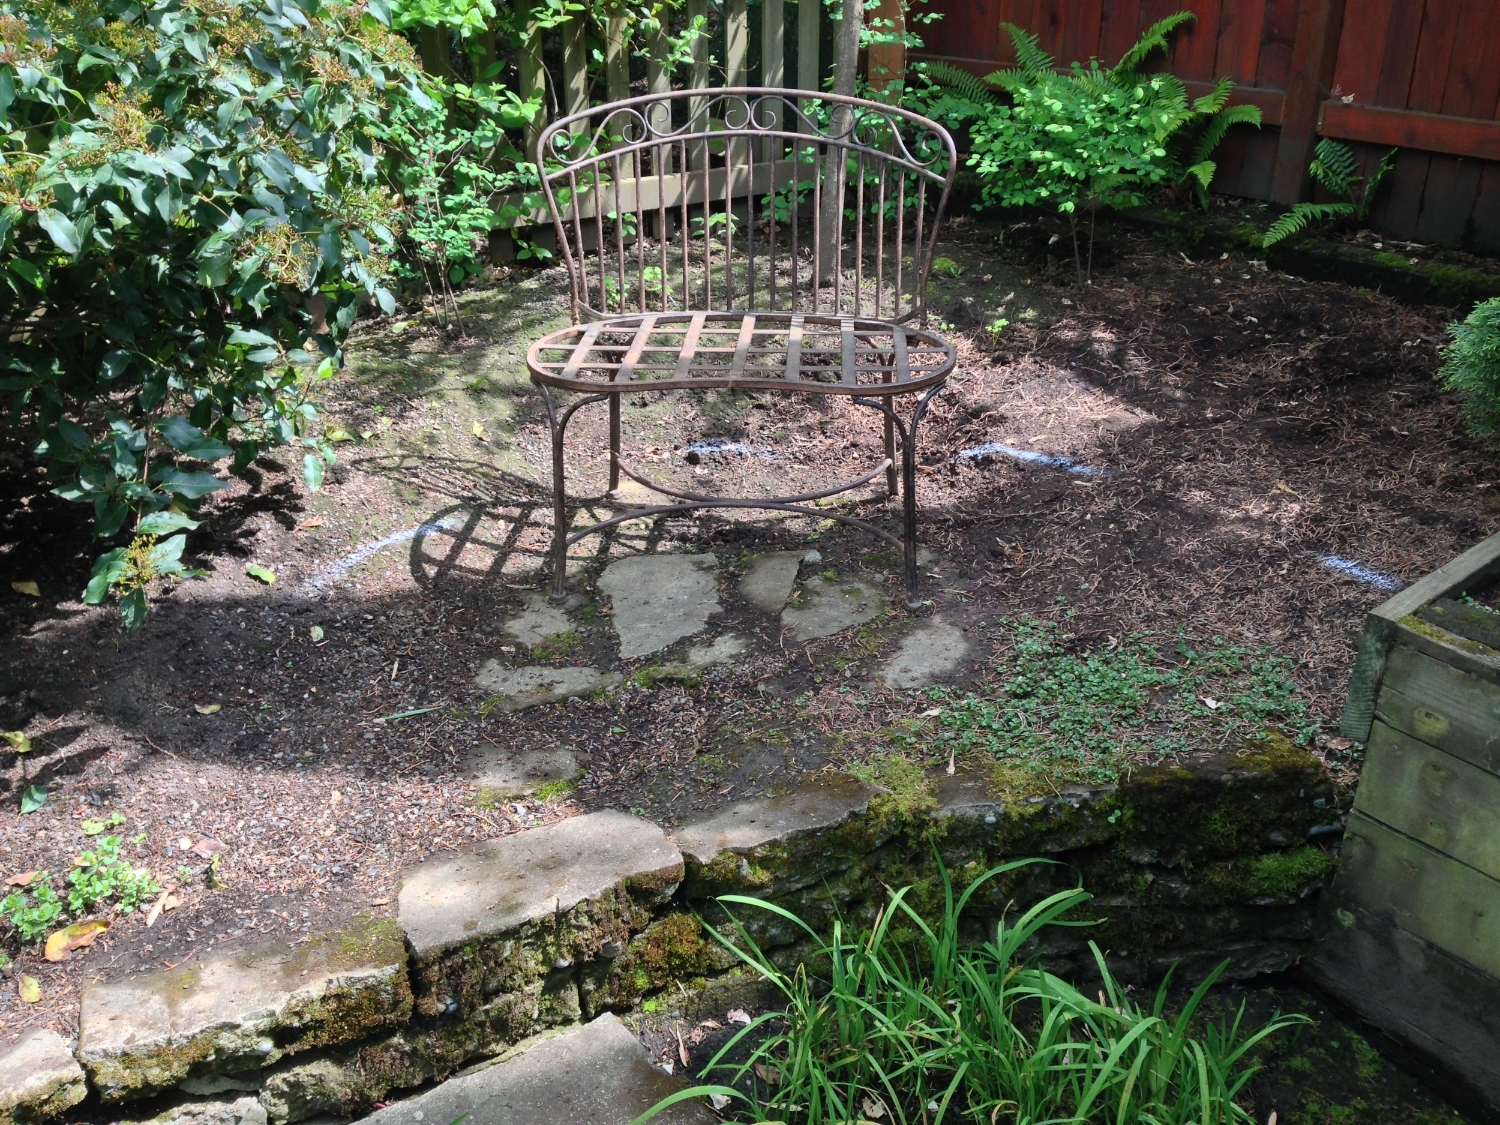
3.) Create a blank slate.
Remove some unnecessary plants and overgrowth, and keep the desired structural plants. In this project, note that some of the plants are on neighbor's side. We were able to edit out some of the worst offenders contributing to a chaotic feeling.
AFTER plant removals. Purple-leaved Loropetalum remains (center), and is already looking more "comfortable." Honeysuckle vine has been trimmed up. dinky plants and Extra pots removed; only the healthy potted Rosemary remains.
4.) Find an element for the foundation of vignette.
In this case, we chose a small wire bench that the homeowners already owned.
We had been trying to use it in other locations, but everywhere it was too small...
the bench that later ended up in our vignette.
...We moved it to the little area at the garage door, and there its proportions were good with the surroundings. Although it was the only thing yet in place, it felt right there.
5.) Add infrastructure where needed.
We added a gravel landing spot for the bench. Although there is no photo of this step, it is one of the steps that takes some material and labor, and was important to the establishment of a new purpose for the area. We excavated 4" deep, relocated excavated soil to other part of garden, used quarter-minus crushed stone (same as existing pathway) and compacted it.
6.) Find some cool art that fits the space.
I feel very fortunate to have found James Merrigan and the screens he builds for his business Garden Art by James. If you are also donating your time and garden to a local Open Garden fundraiser, as we were in this case, you may have the opportunity to ask a local craftsperson to be the featured artist in your show. I asked James, and he accepted!
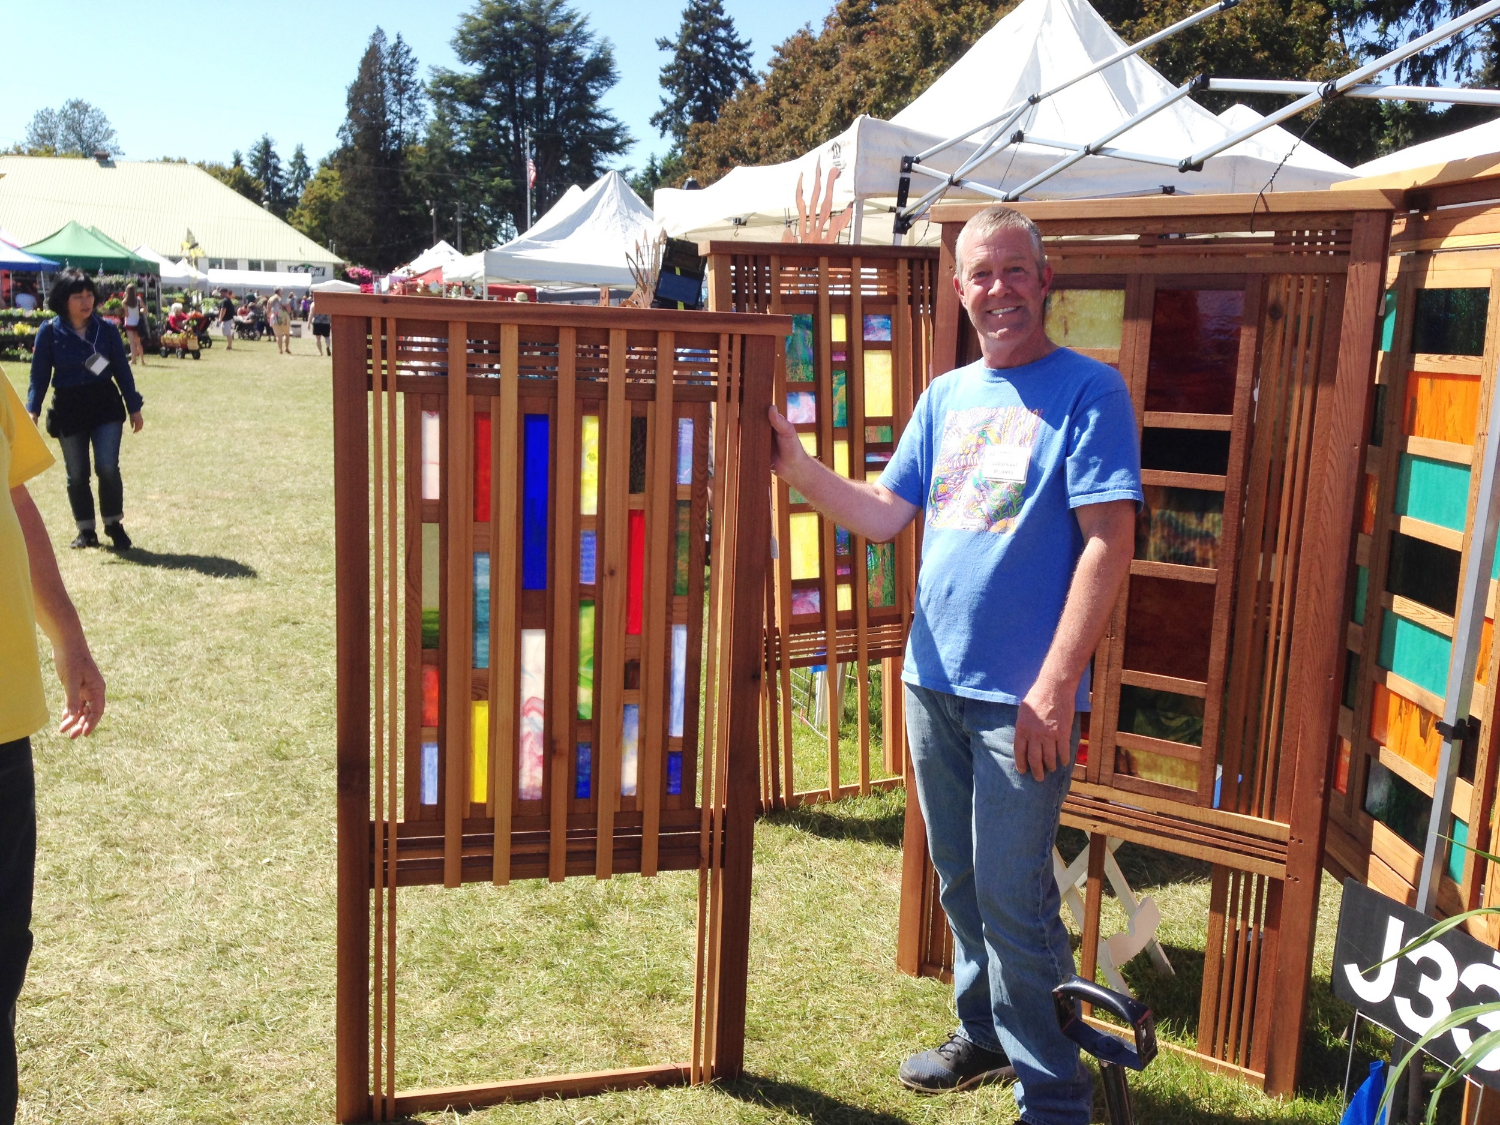
Carpentry and glass artist James Merrigan, of Portland OR, at the Canby Master Gardeners Fair 2016.
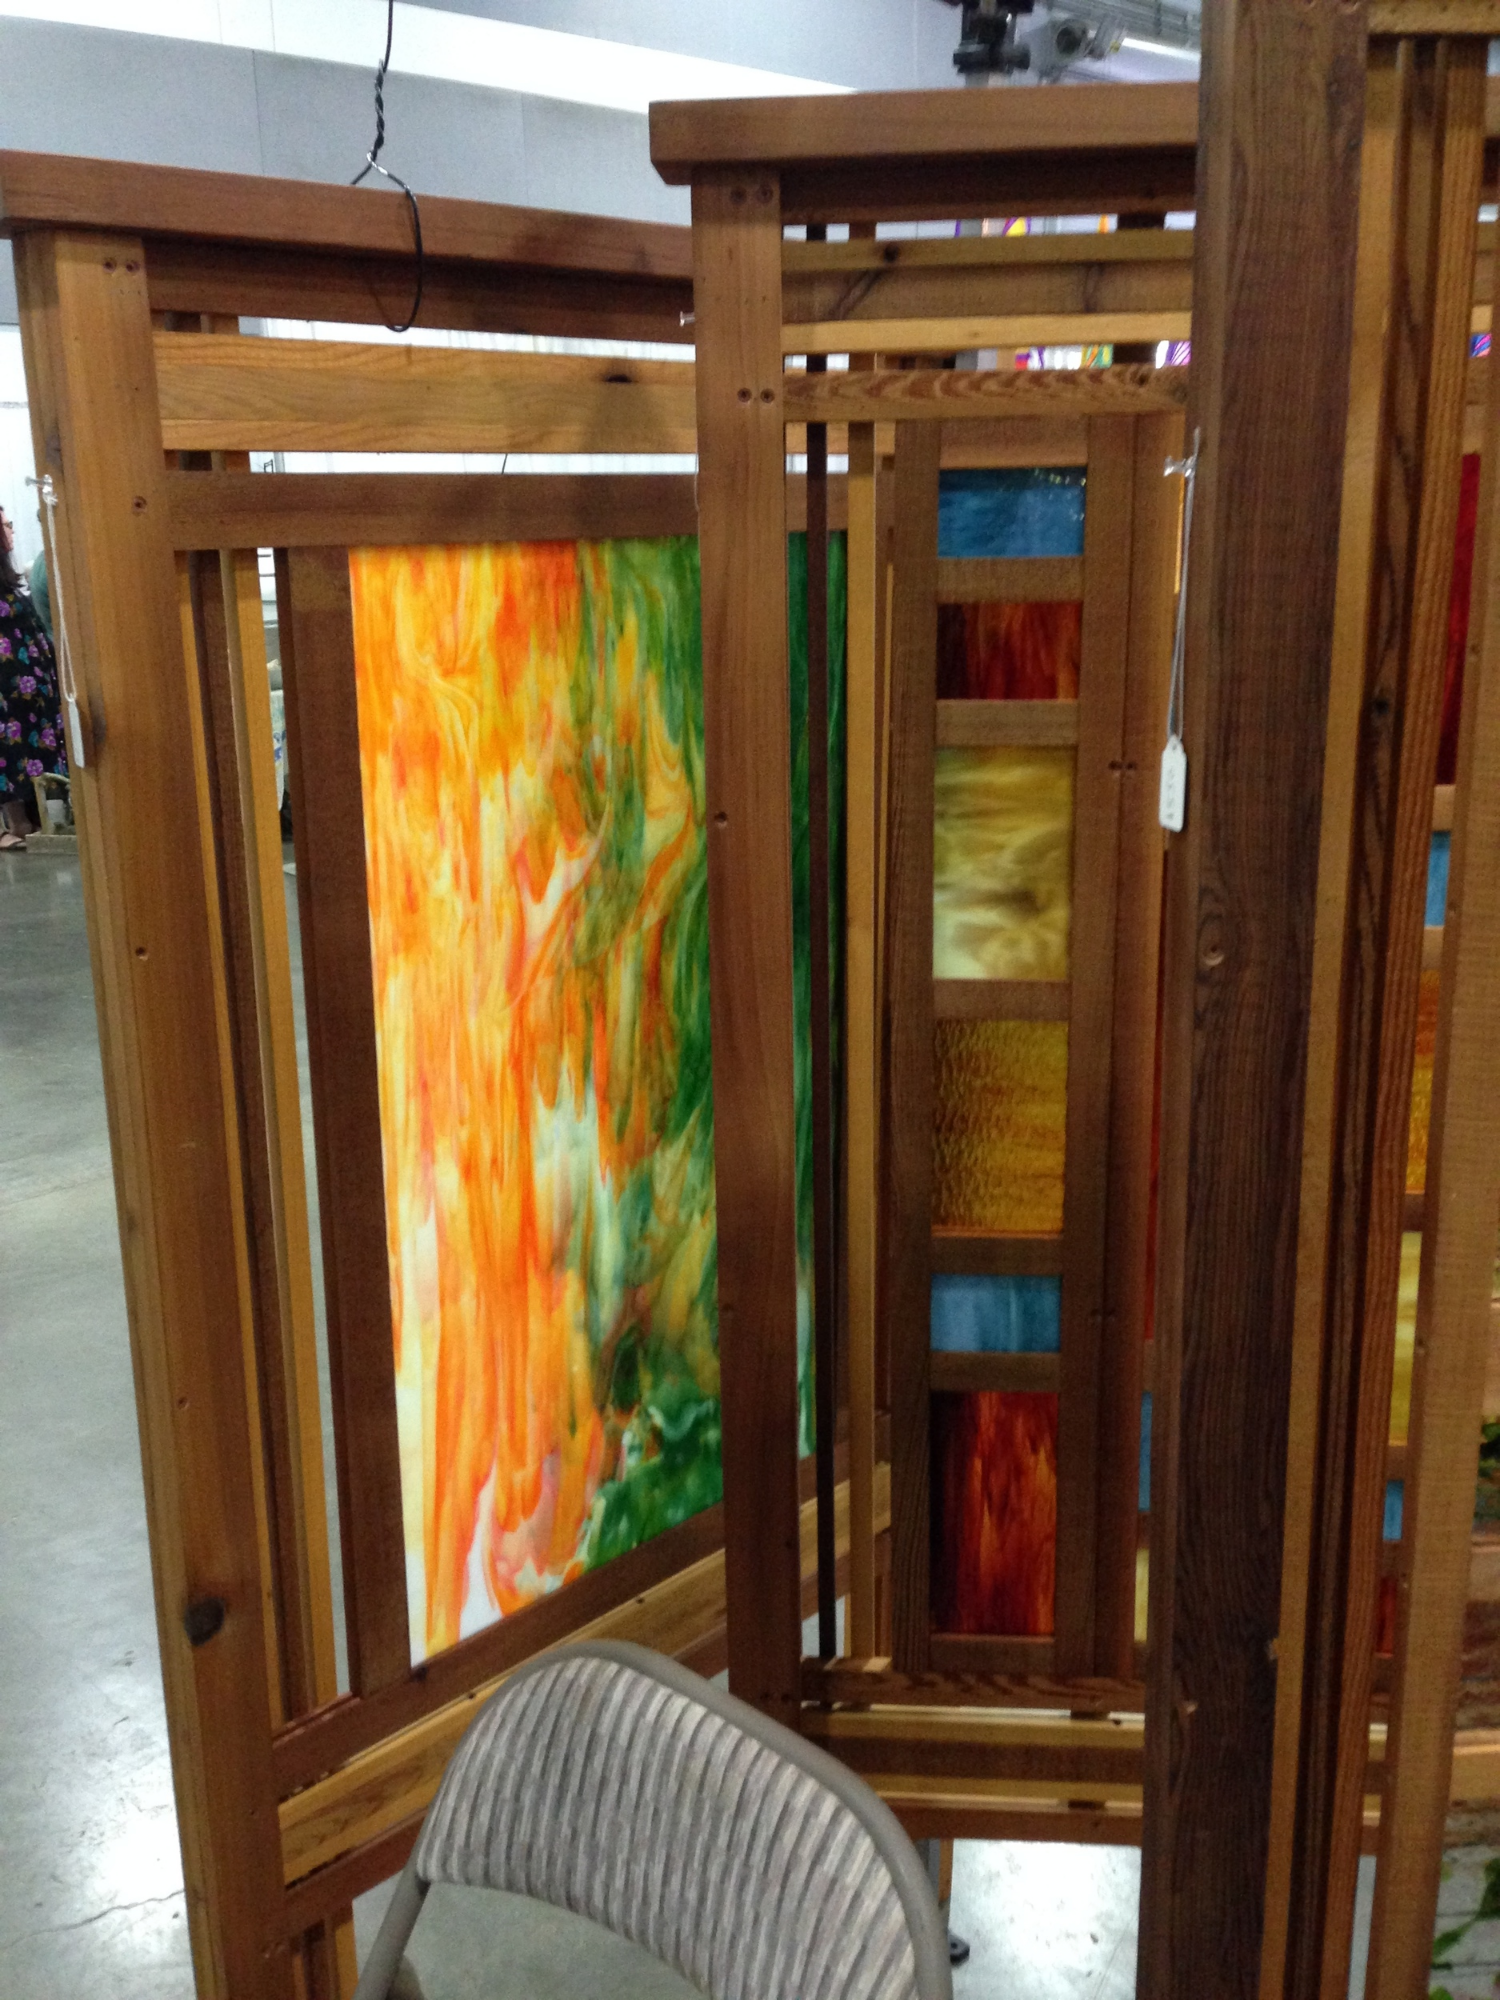
Garden Art by James screens at the HPSO Hortlandia sale 2016. The screen on the left would become the backbone of our vignette story today, but none of us knew it at the time.
7.) Collaborate with artist when you can!
I visited James' shop and we selected several screen options to use in this client's garden. On the day he brought the screens on site, we tried this one behind the little bench. This location immediately grew on everyone.
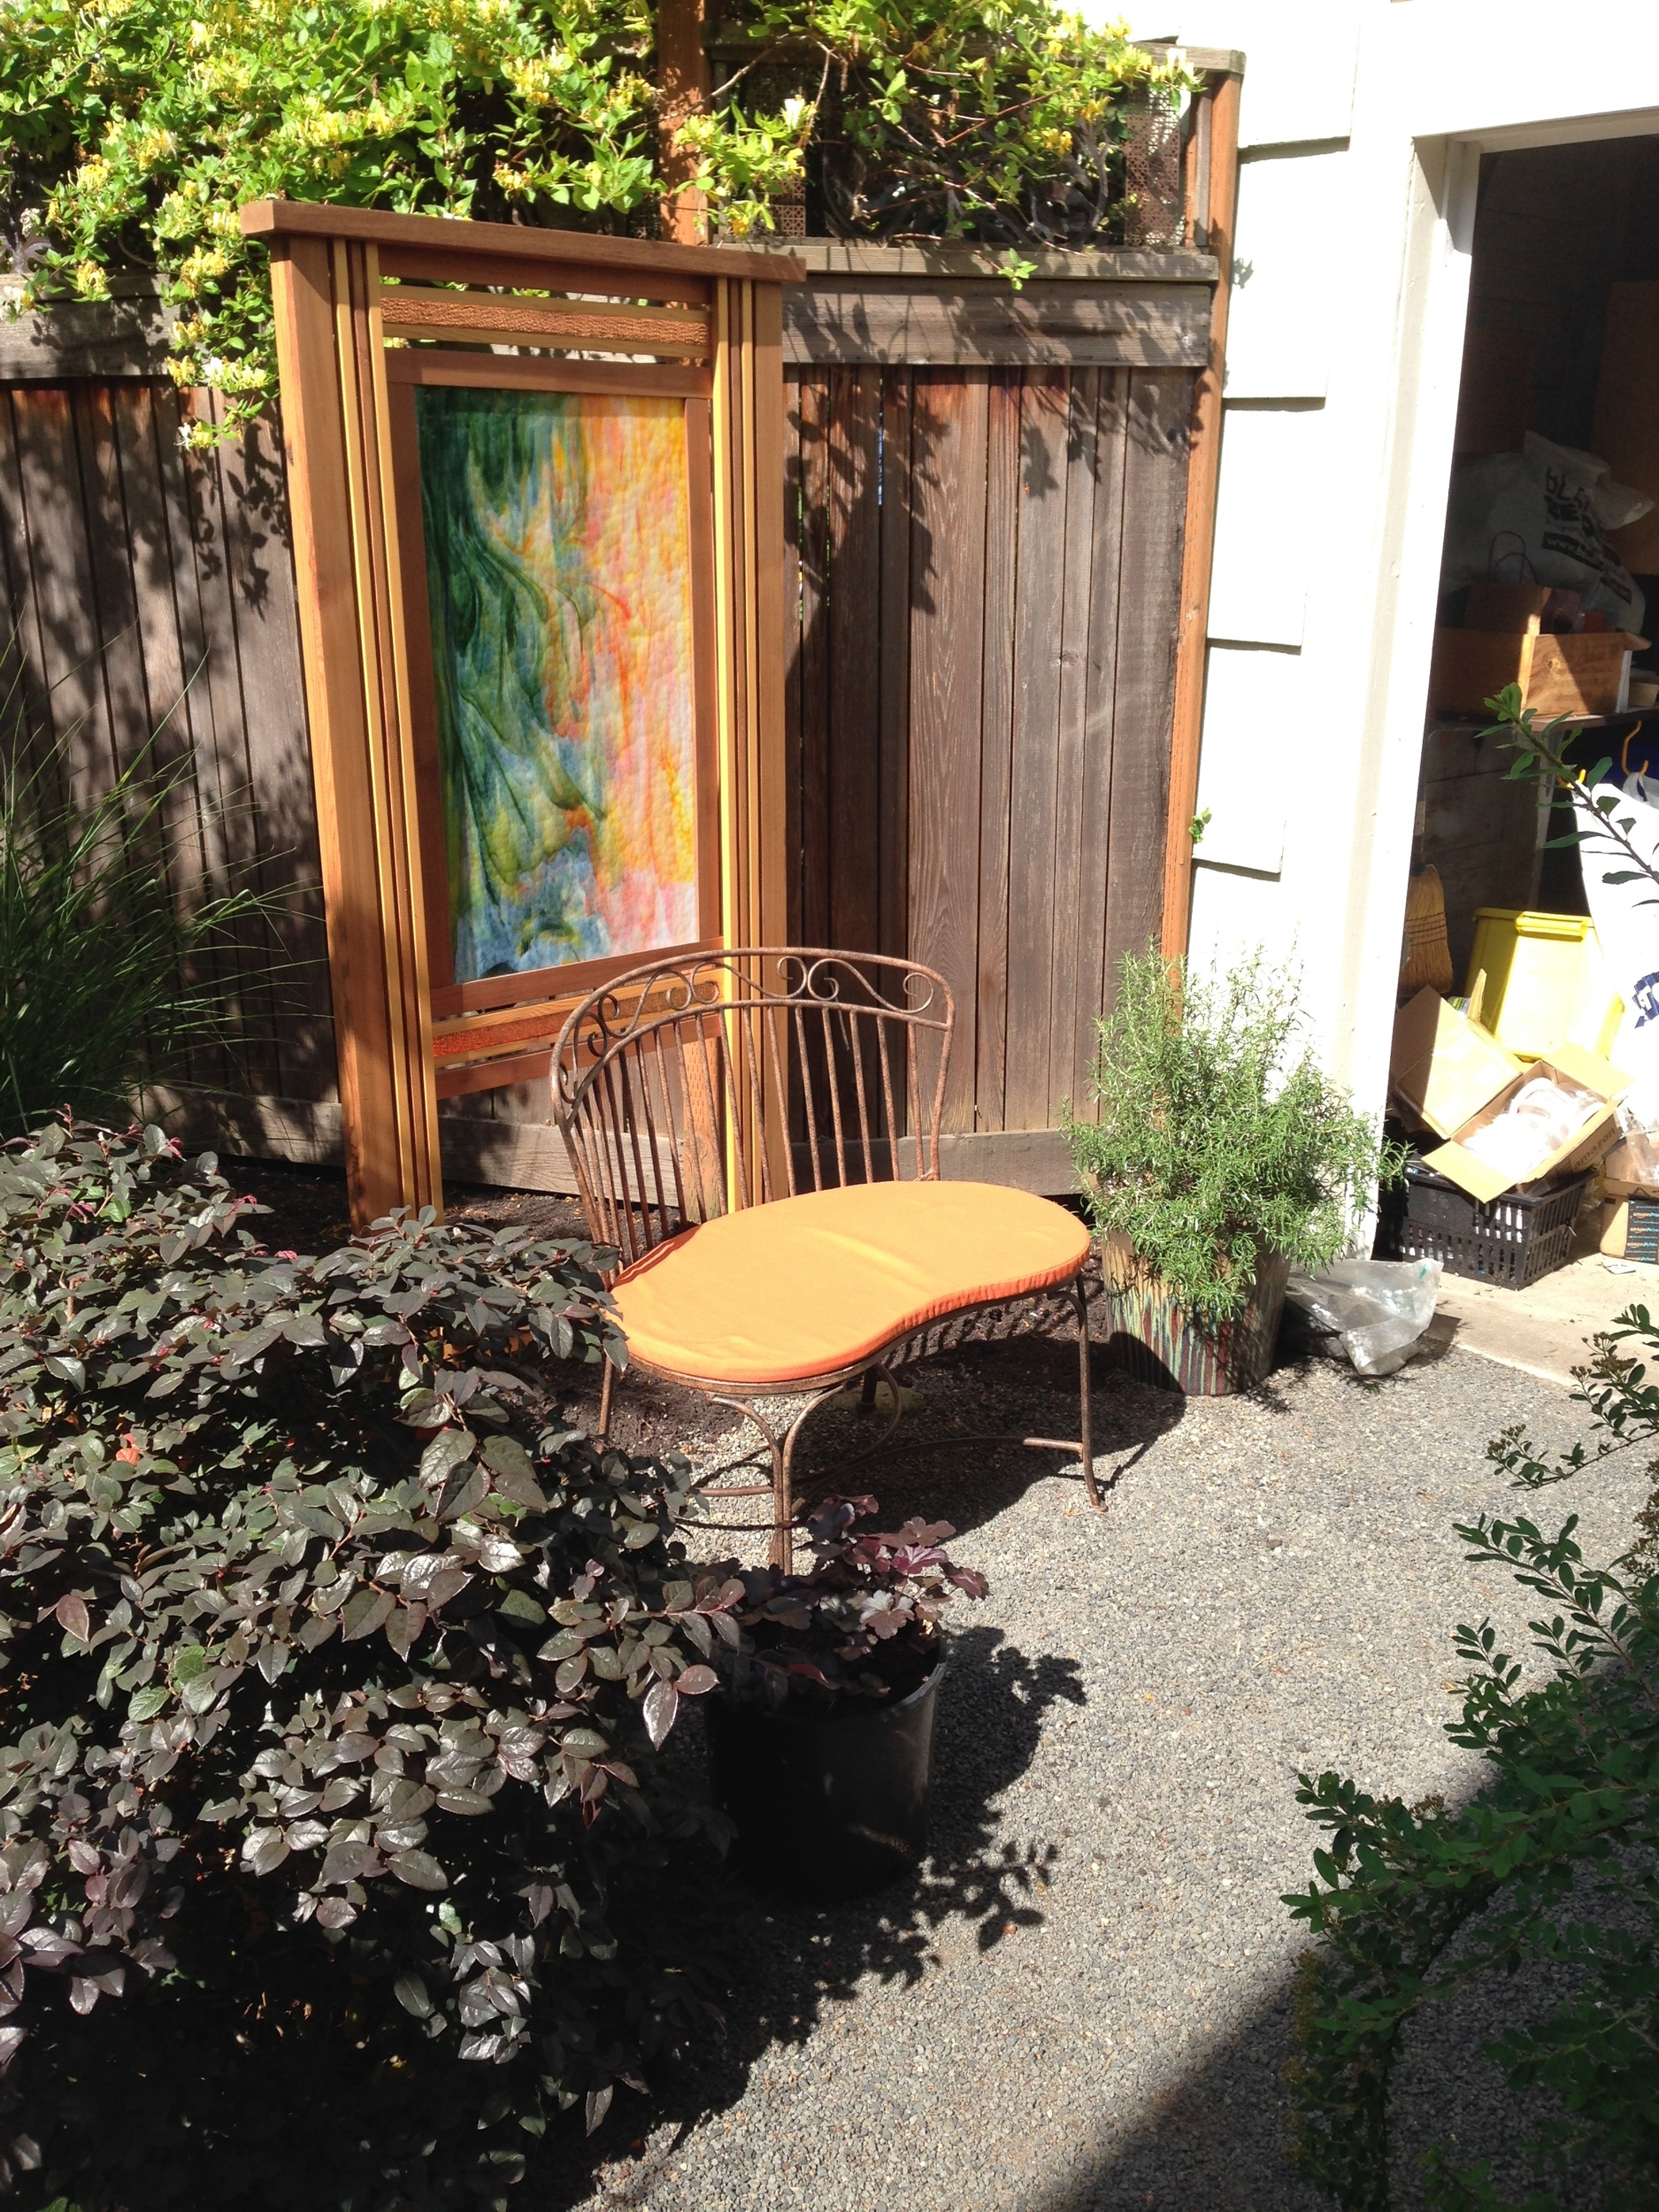
Location of art screen is good. Containers yet to be determined. There is still a hole at the right side of the bench.
8.) Fill in with proportionate elements as needed.
Our space needed containers. Tip for container selection: try samples on site, such as spare big black nursery containers--even empty boxes--anything to put on the ground and determine the right scale of the future containers.
By this method we determined the need for one ~16" x ~16" container, and one upright. Then went shopping. The hard part about shopping is now you also must make decisions about form and color and texture...etc. It can get quite complicated, but your trying size examples first will help a lot.

the array of container choices at a local nursery. (better would have been to include something in this photo for scale)
When shopping, use measurements (or your hand when you forget your measuring tape!). I know that two of my hand widths = 16". If you use photos while shopping, put something in the photo for scale. In choosing containers, scale is everything!
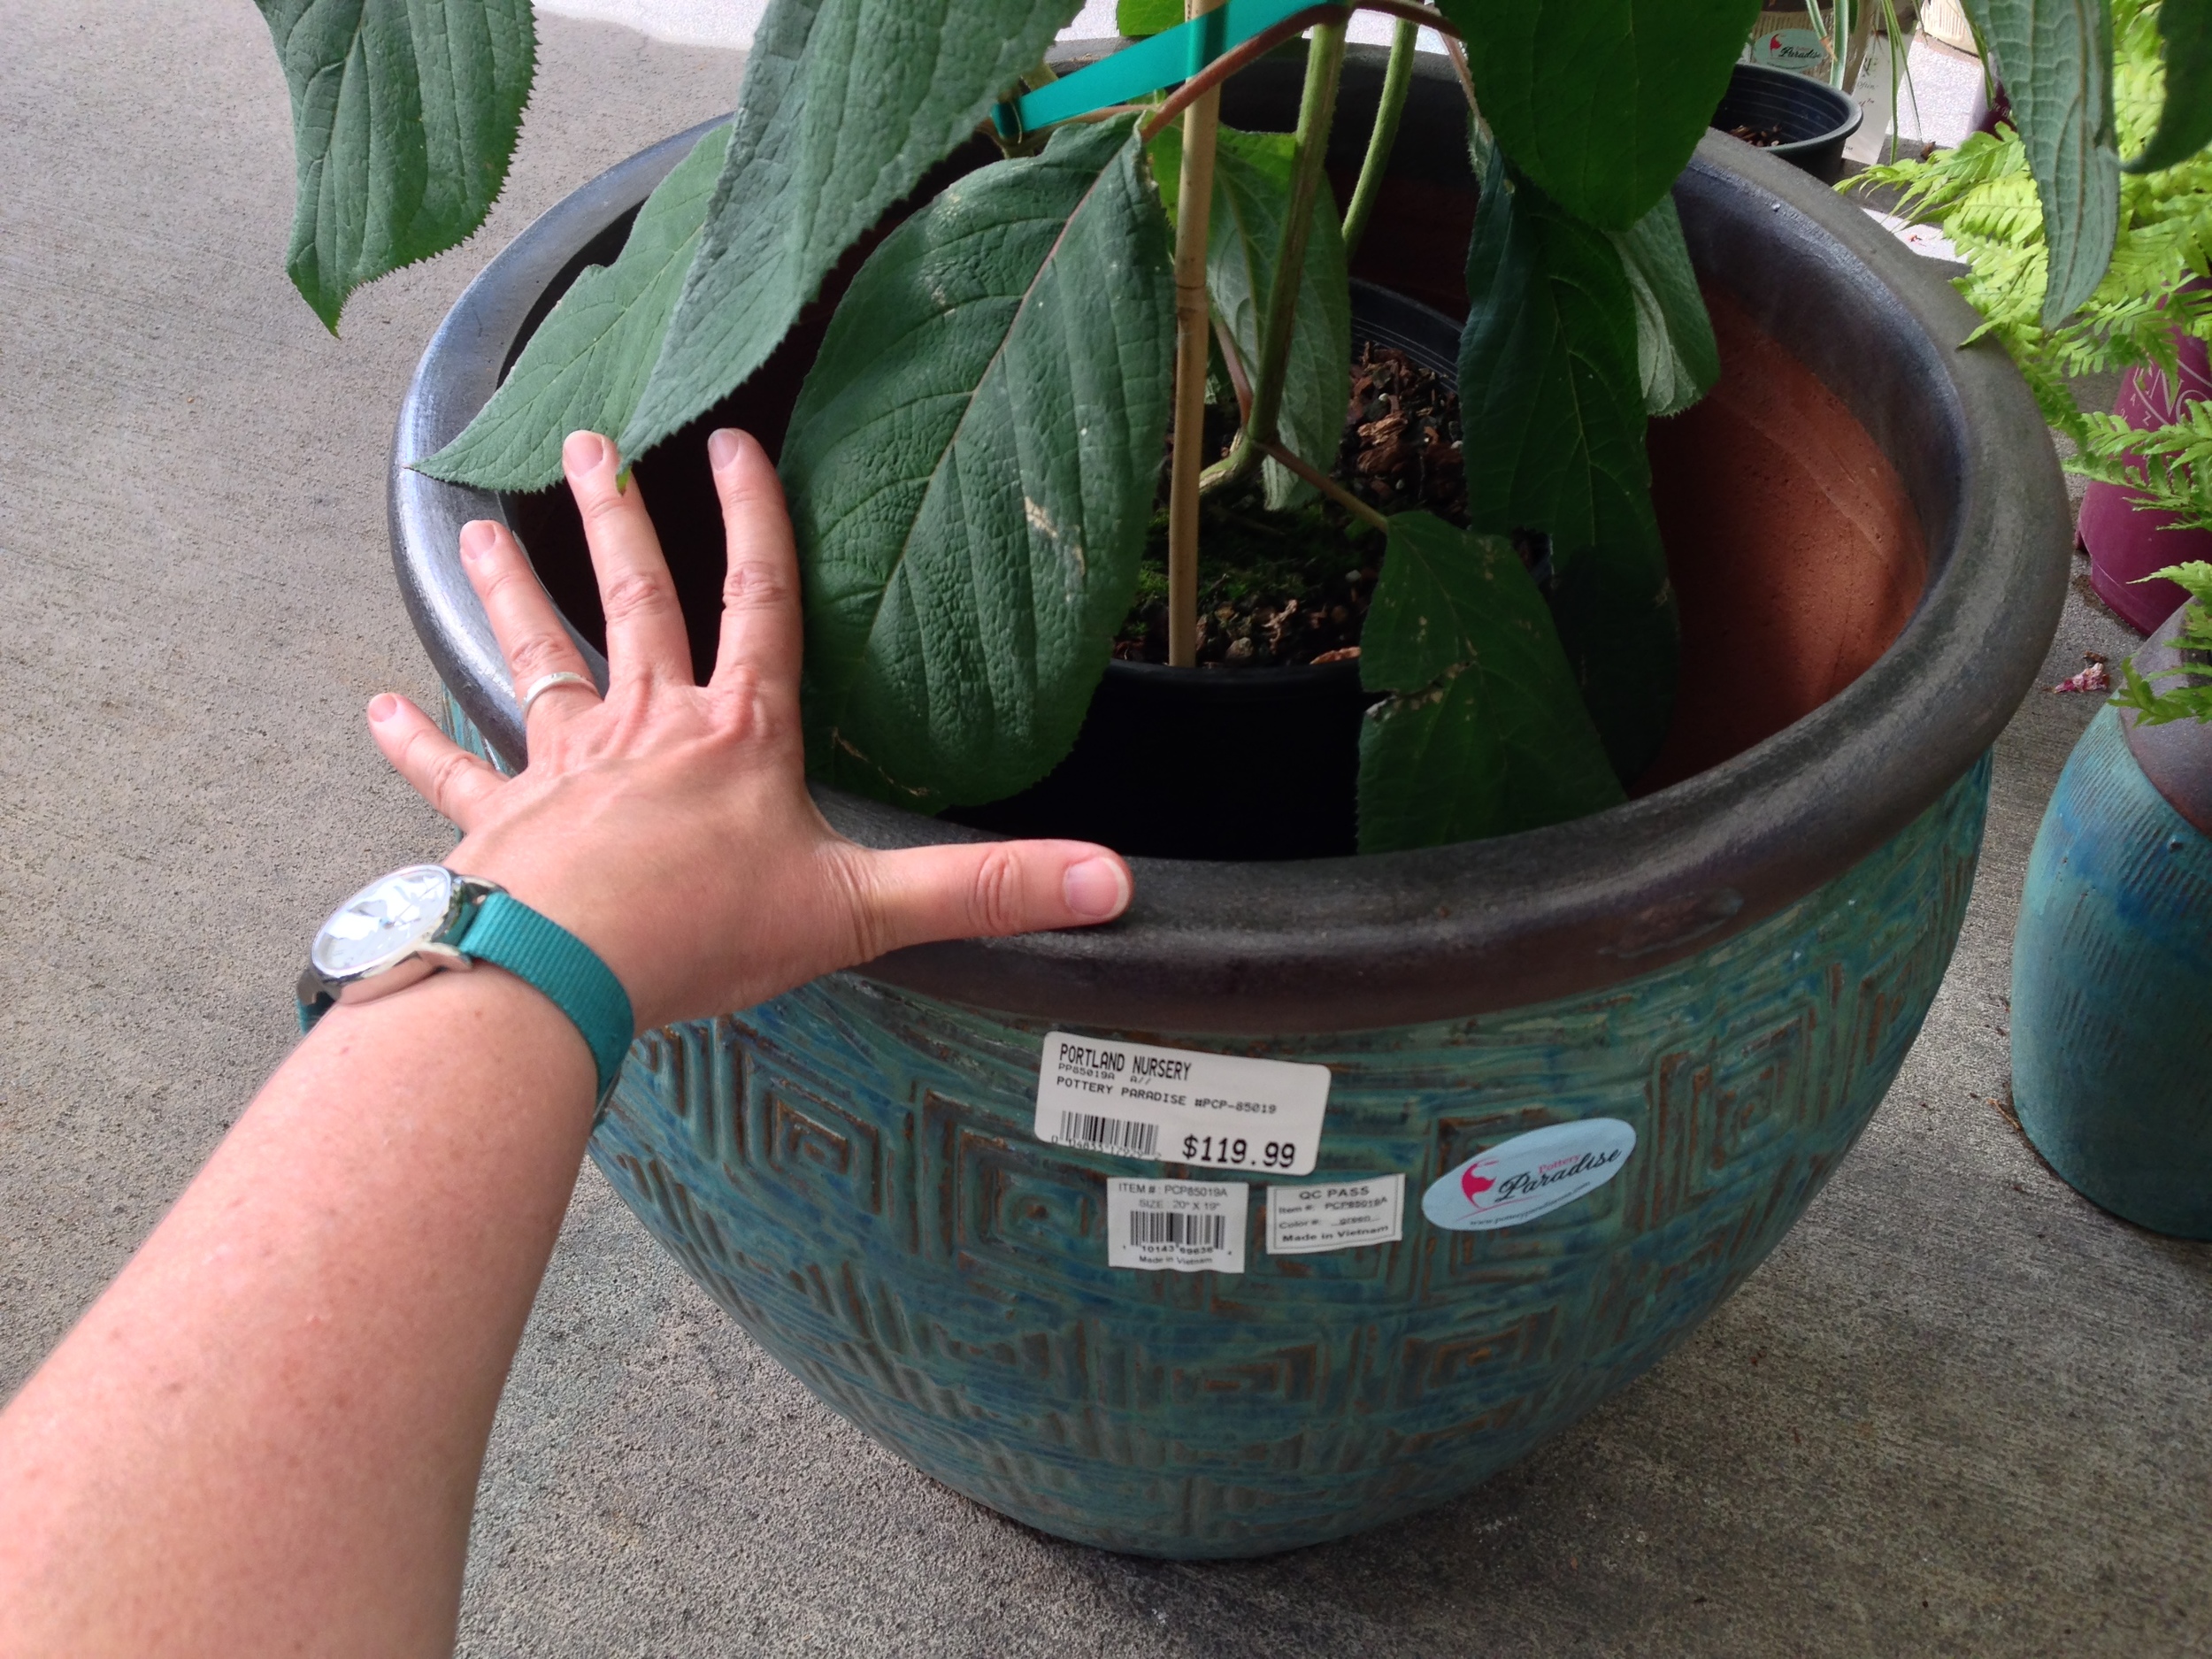
container shopping, using photos for "notes." my hand spread is 8 inches, so i know this pot is 16-18" wide. with this photo I have a record of the price of the container, all its colors and form, and most importantly, its size.
We found our containers. This homeowner prefers simple pots, and plants that carry the show, instead of the container. We chose lightweight resin containers, which can make a gardener's life much easier in the long run. The upright form was very helpful in this narrow space.
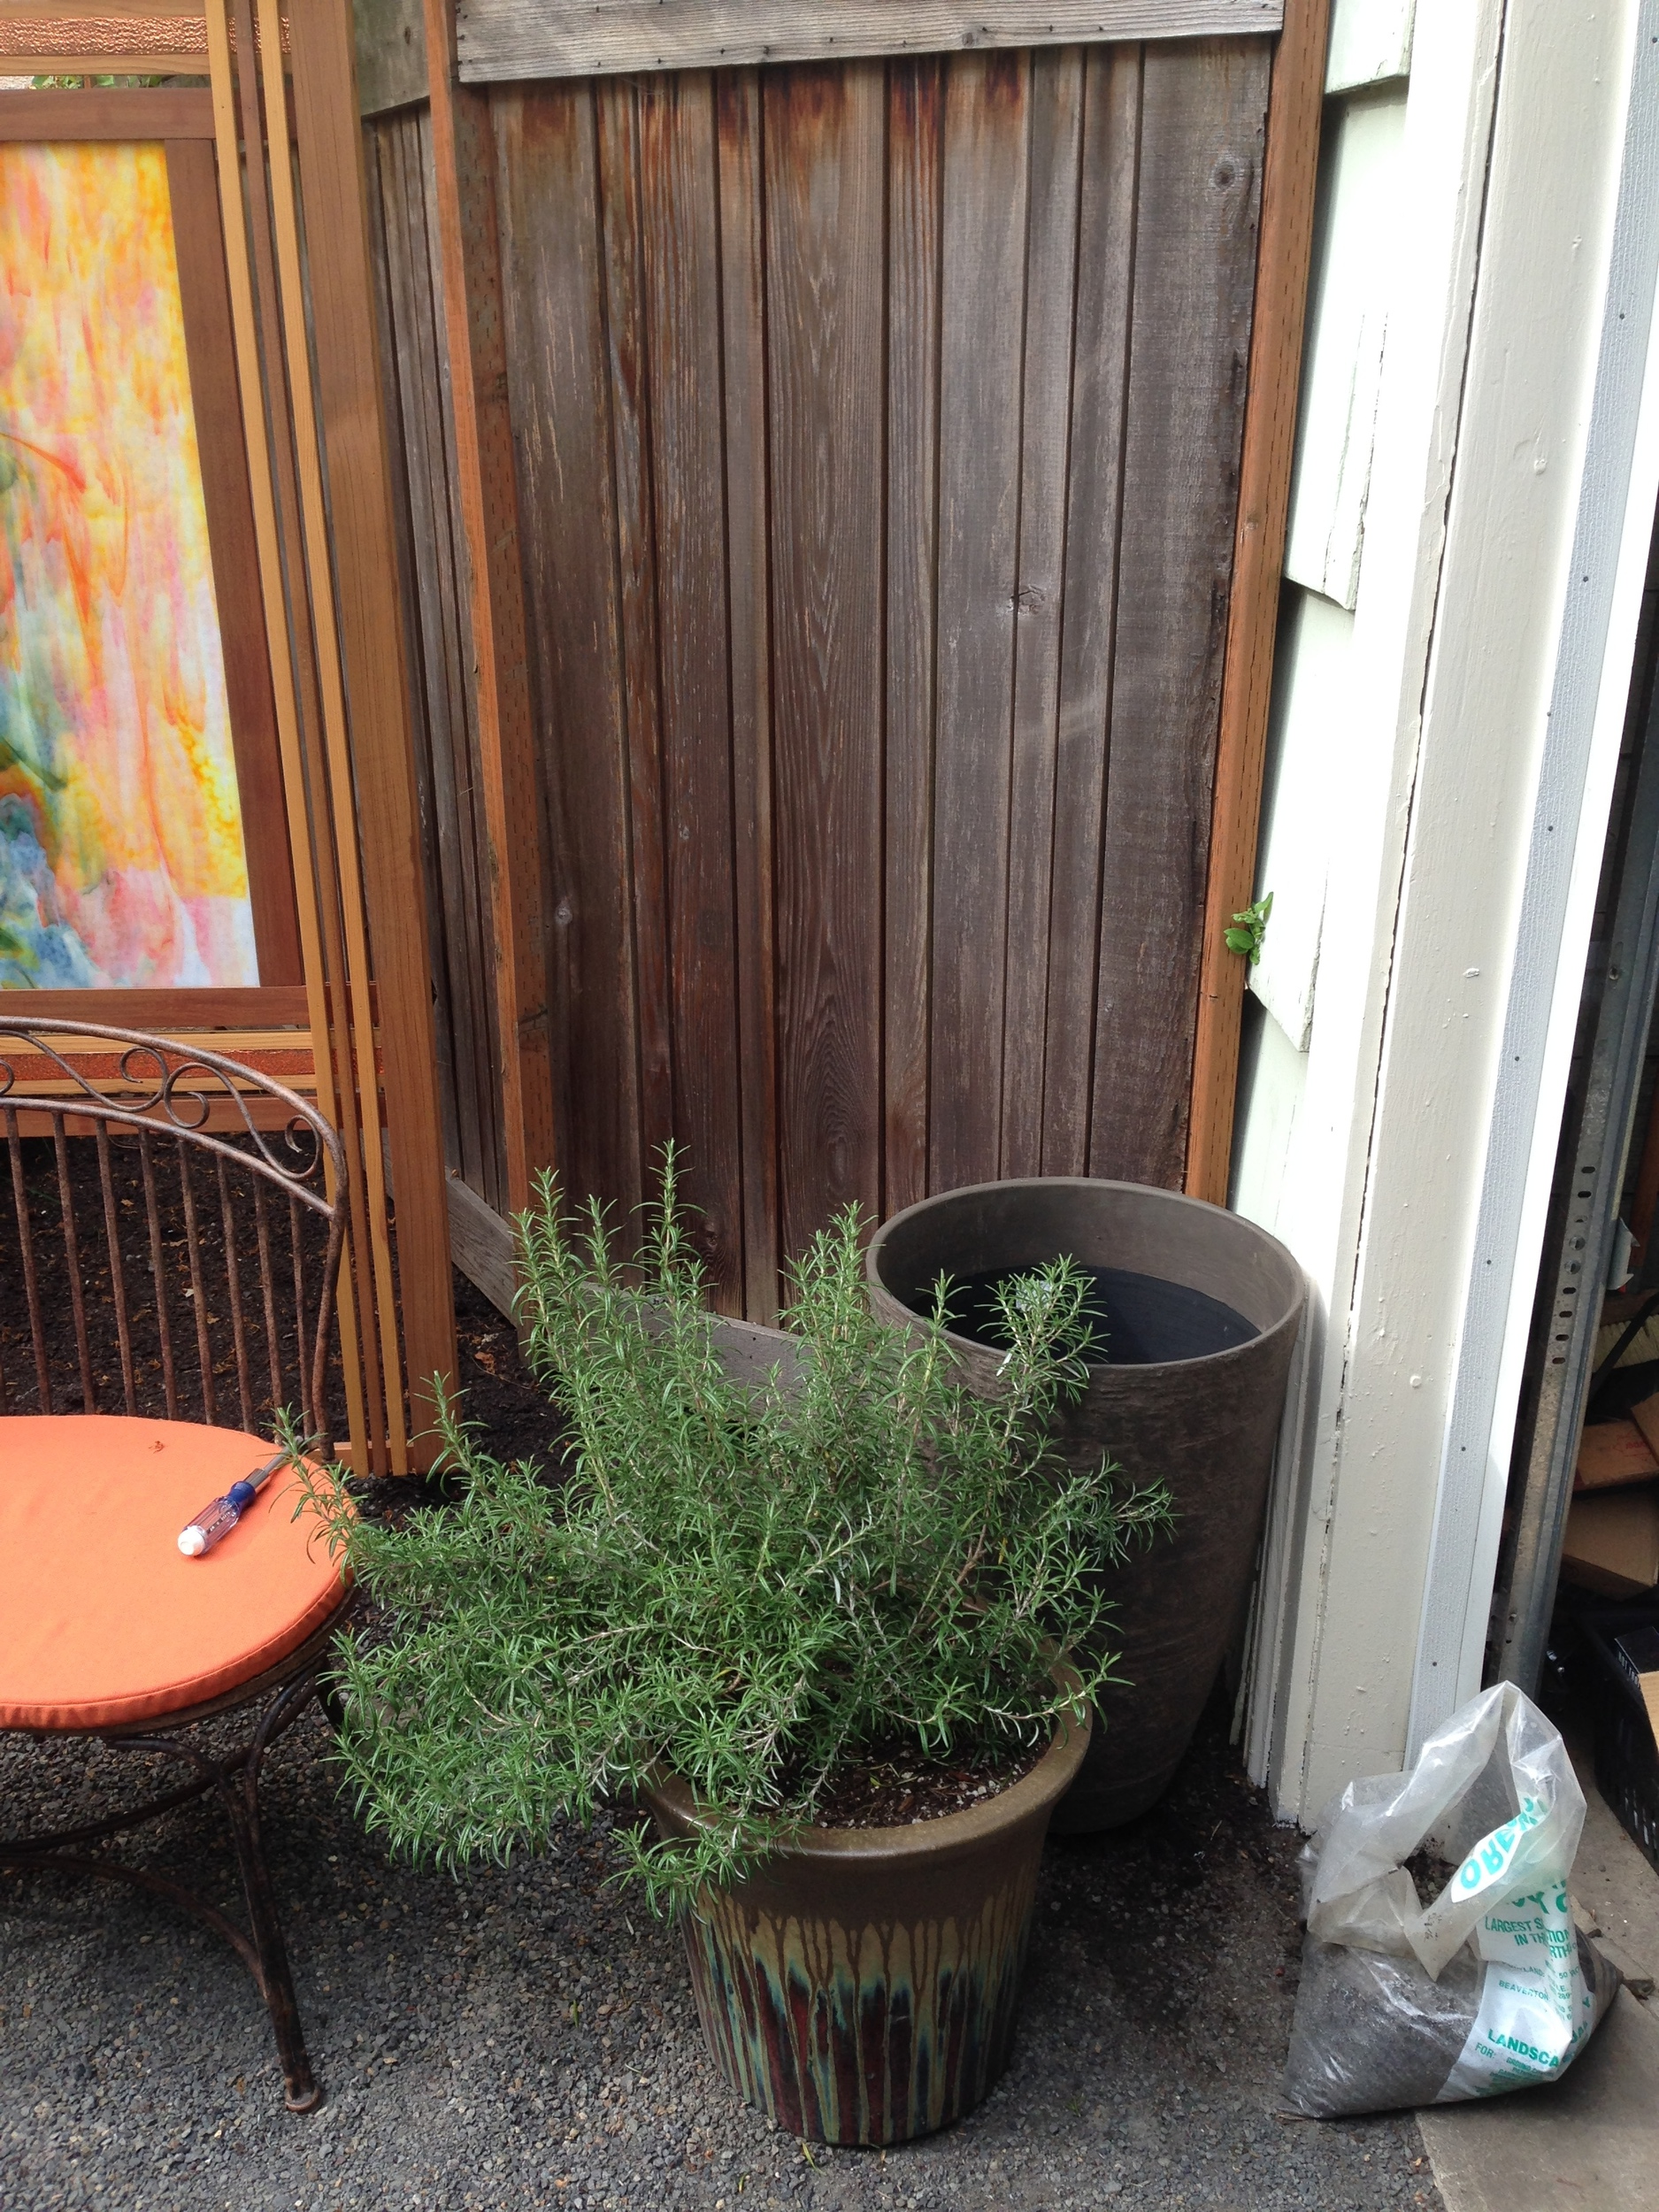
vertical pots (like the one in back) are key to a composition in a small space. the next day we acquired a third pot, also vertical in form, mid-height between the two shown above. this completed a "triangle" of container heights.
9.) Choose plants
Our little composition needed height, as well as plants able to take the hot sun and life in a container. I found these Staghorn Sumac (Rhus typina 'Laciniata') at the nursery and knew they would fit the bill. Took photos to work out the combinations and heights (using heights in triangles, for example, is a good design tip--but that is a topic for another day). Brought two Sumac back to the site to try in the pots.
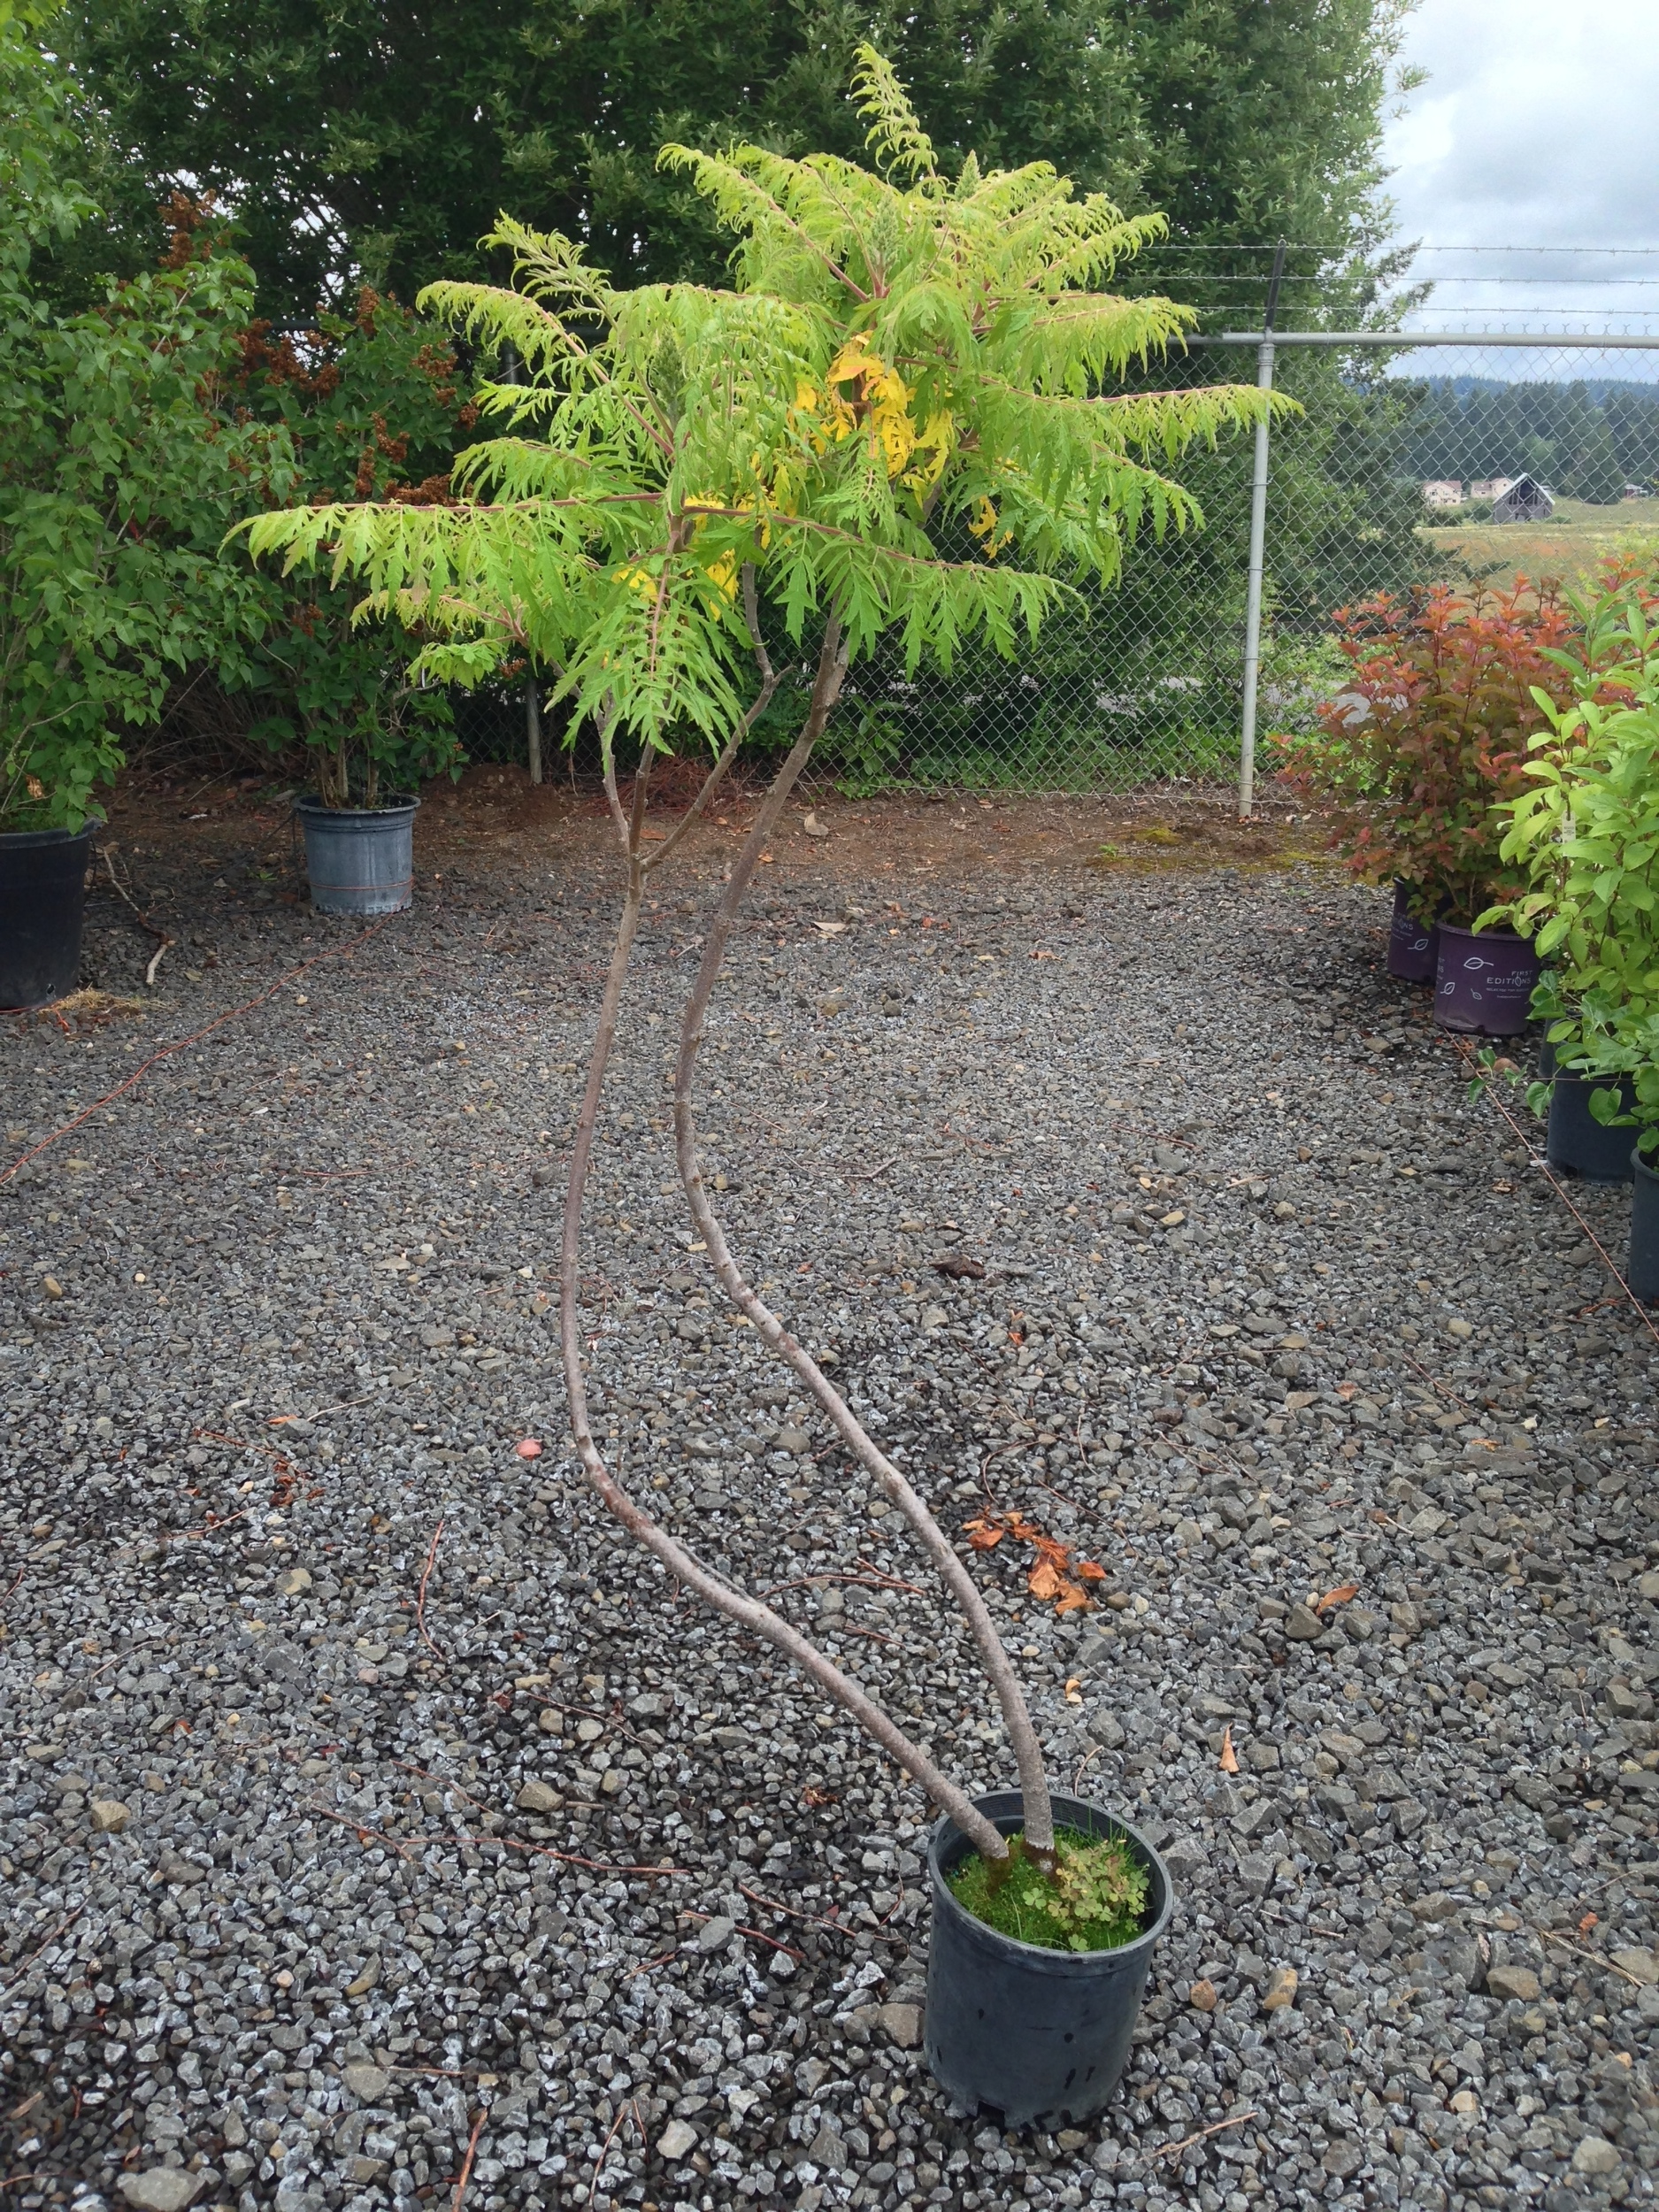
This Staghorn Sumac at the nursery was almost Linus-Christmas-tree awkward, but I really liked the curve of its trunk. It would help the strict-lines and angles at the spot I wanted to us it.
10.) Plant the containers.
If a 100-degree day is forecast on the weekend before your Open Garden, and you must plant your containers that very day...hang shade cloth!
the "crew" (my husband, the homeowner,, and, well, me!) erect a small shade cloth canopy over the containers being planted on a 100-degree day.
11.) Enjoy!

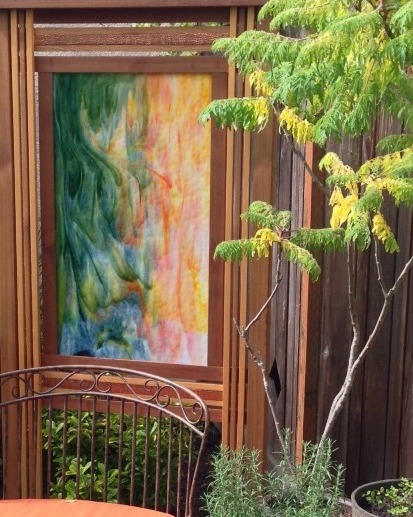
The finished composition: bench, screen, three pots, three main plants, all in shades of neutrals, greens and orange.
vignette detail. stained glass screen by james merrigan ("Garden Art by James").
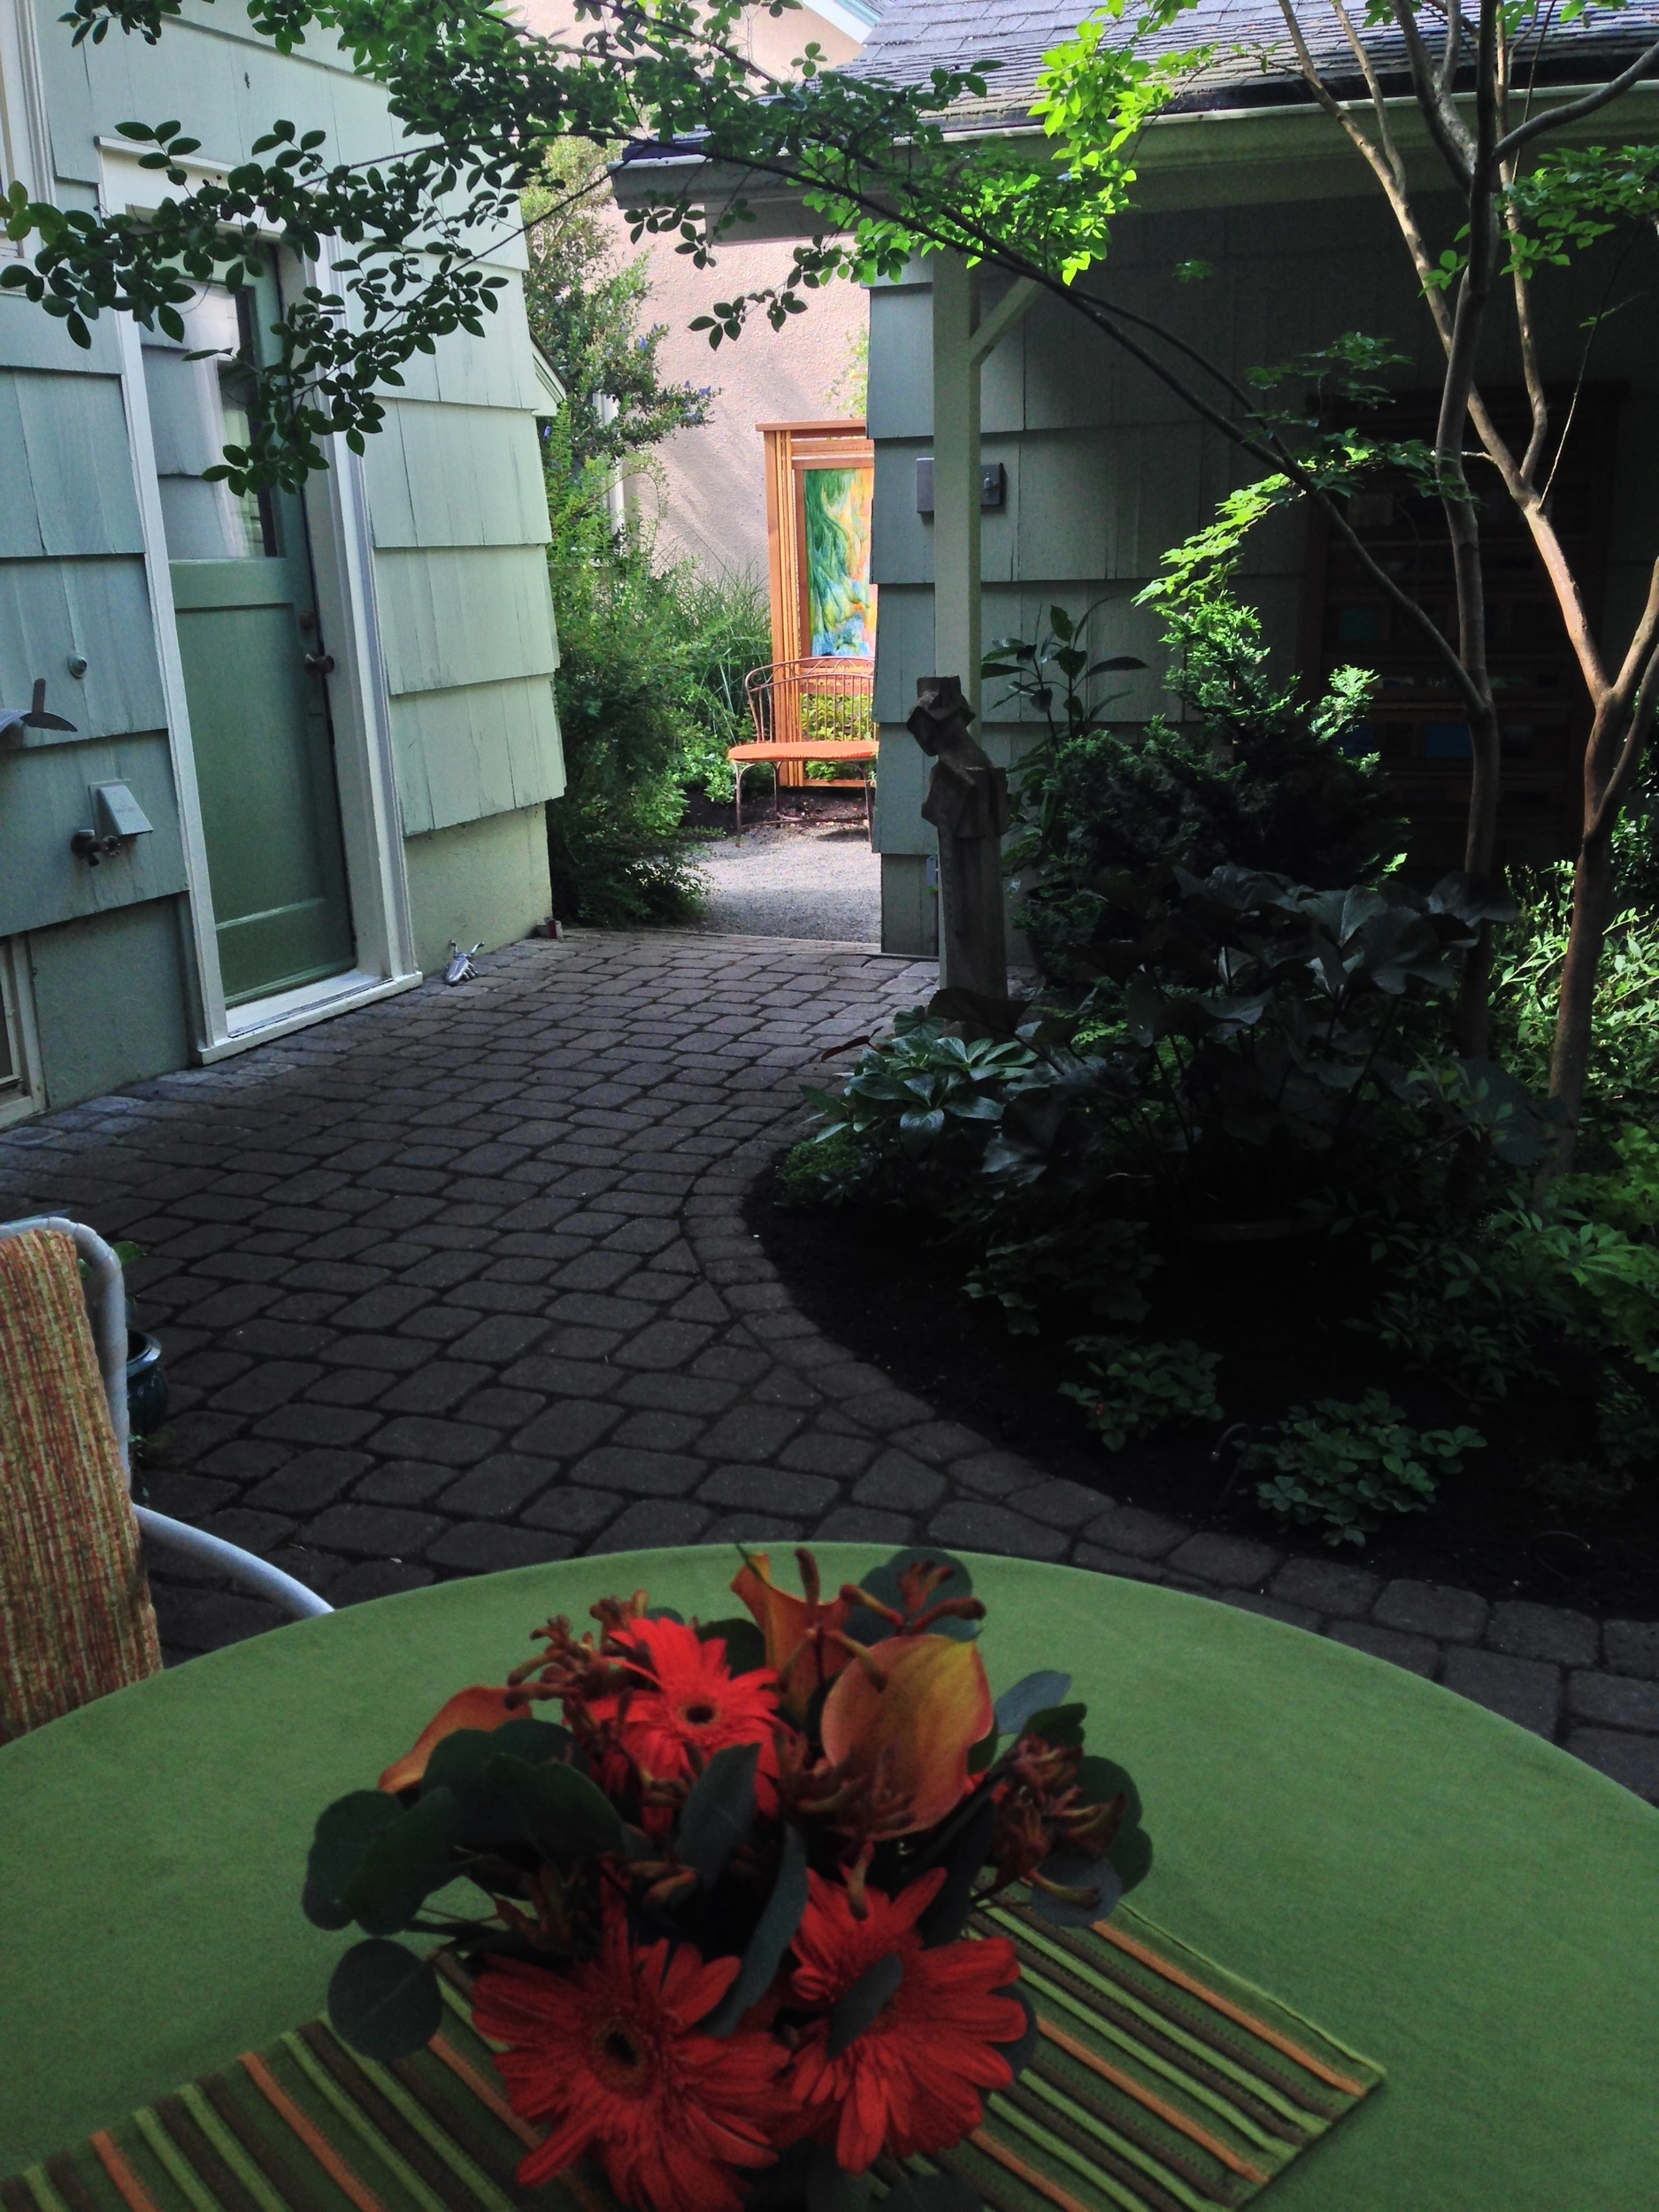
the setting sun at the end of a long day. this site line from the back yard living area, formerly a blank wall (at best), now glows with interest.